Installation Guide
- HomeGuardian.AI Model iIi device
- Wall mount (Swivel)
- Power cable and USB plug
- Pack of screws
This guide will outline how to use the above equipment to set up the HomeGuardian device to monitor an environment correctly.


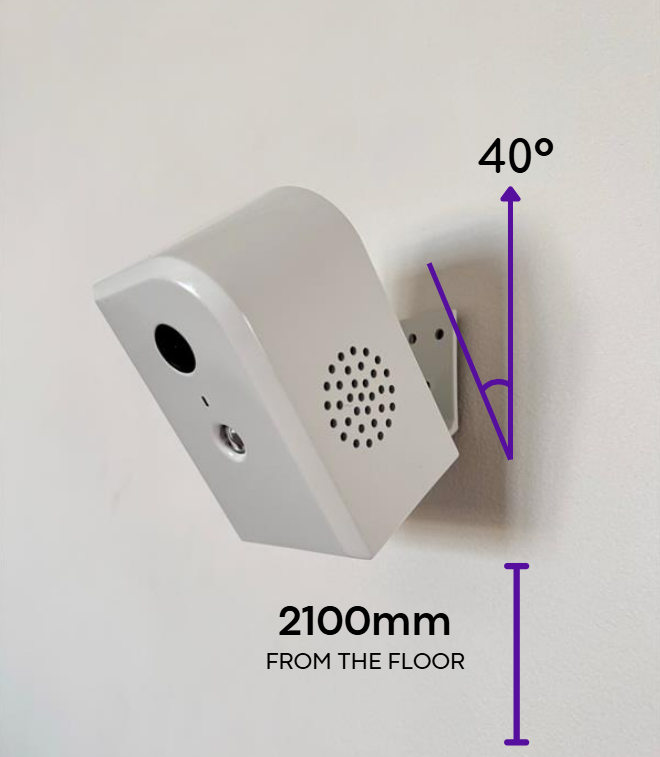
Units are to be wall-mounted. The bottom of the wall mount is to be set at 2100mm from the floor.
Screw the HomeGuardian.AI device into the wall mount. When positioned correctly, the device will be sitting at a 40-degree angle. The device is to be angled so that the lens would be able to view a vast, unblocked amount of floor space.
Connect the USB cable / power pack to the USB-C port in the back of the HomeGuardian device. If the distance from the device to the wall socket is greater than two metres please attach an extension cable.
**Do not remove the warranty sticker on the back of the device.
If the device is preconfigured to connect to the customer’s Wi-Fi, please skip to Step 6; otherwise, do the following:
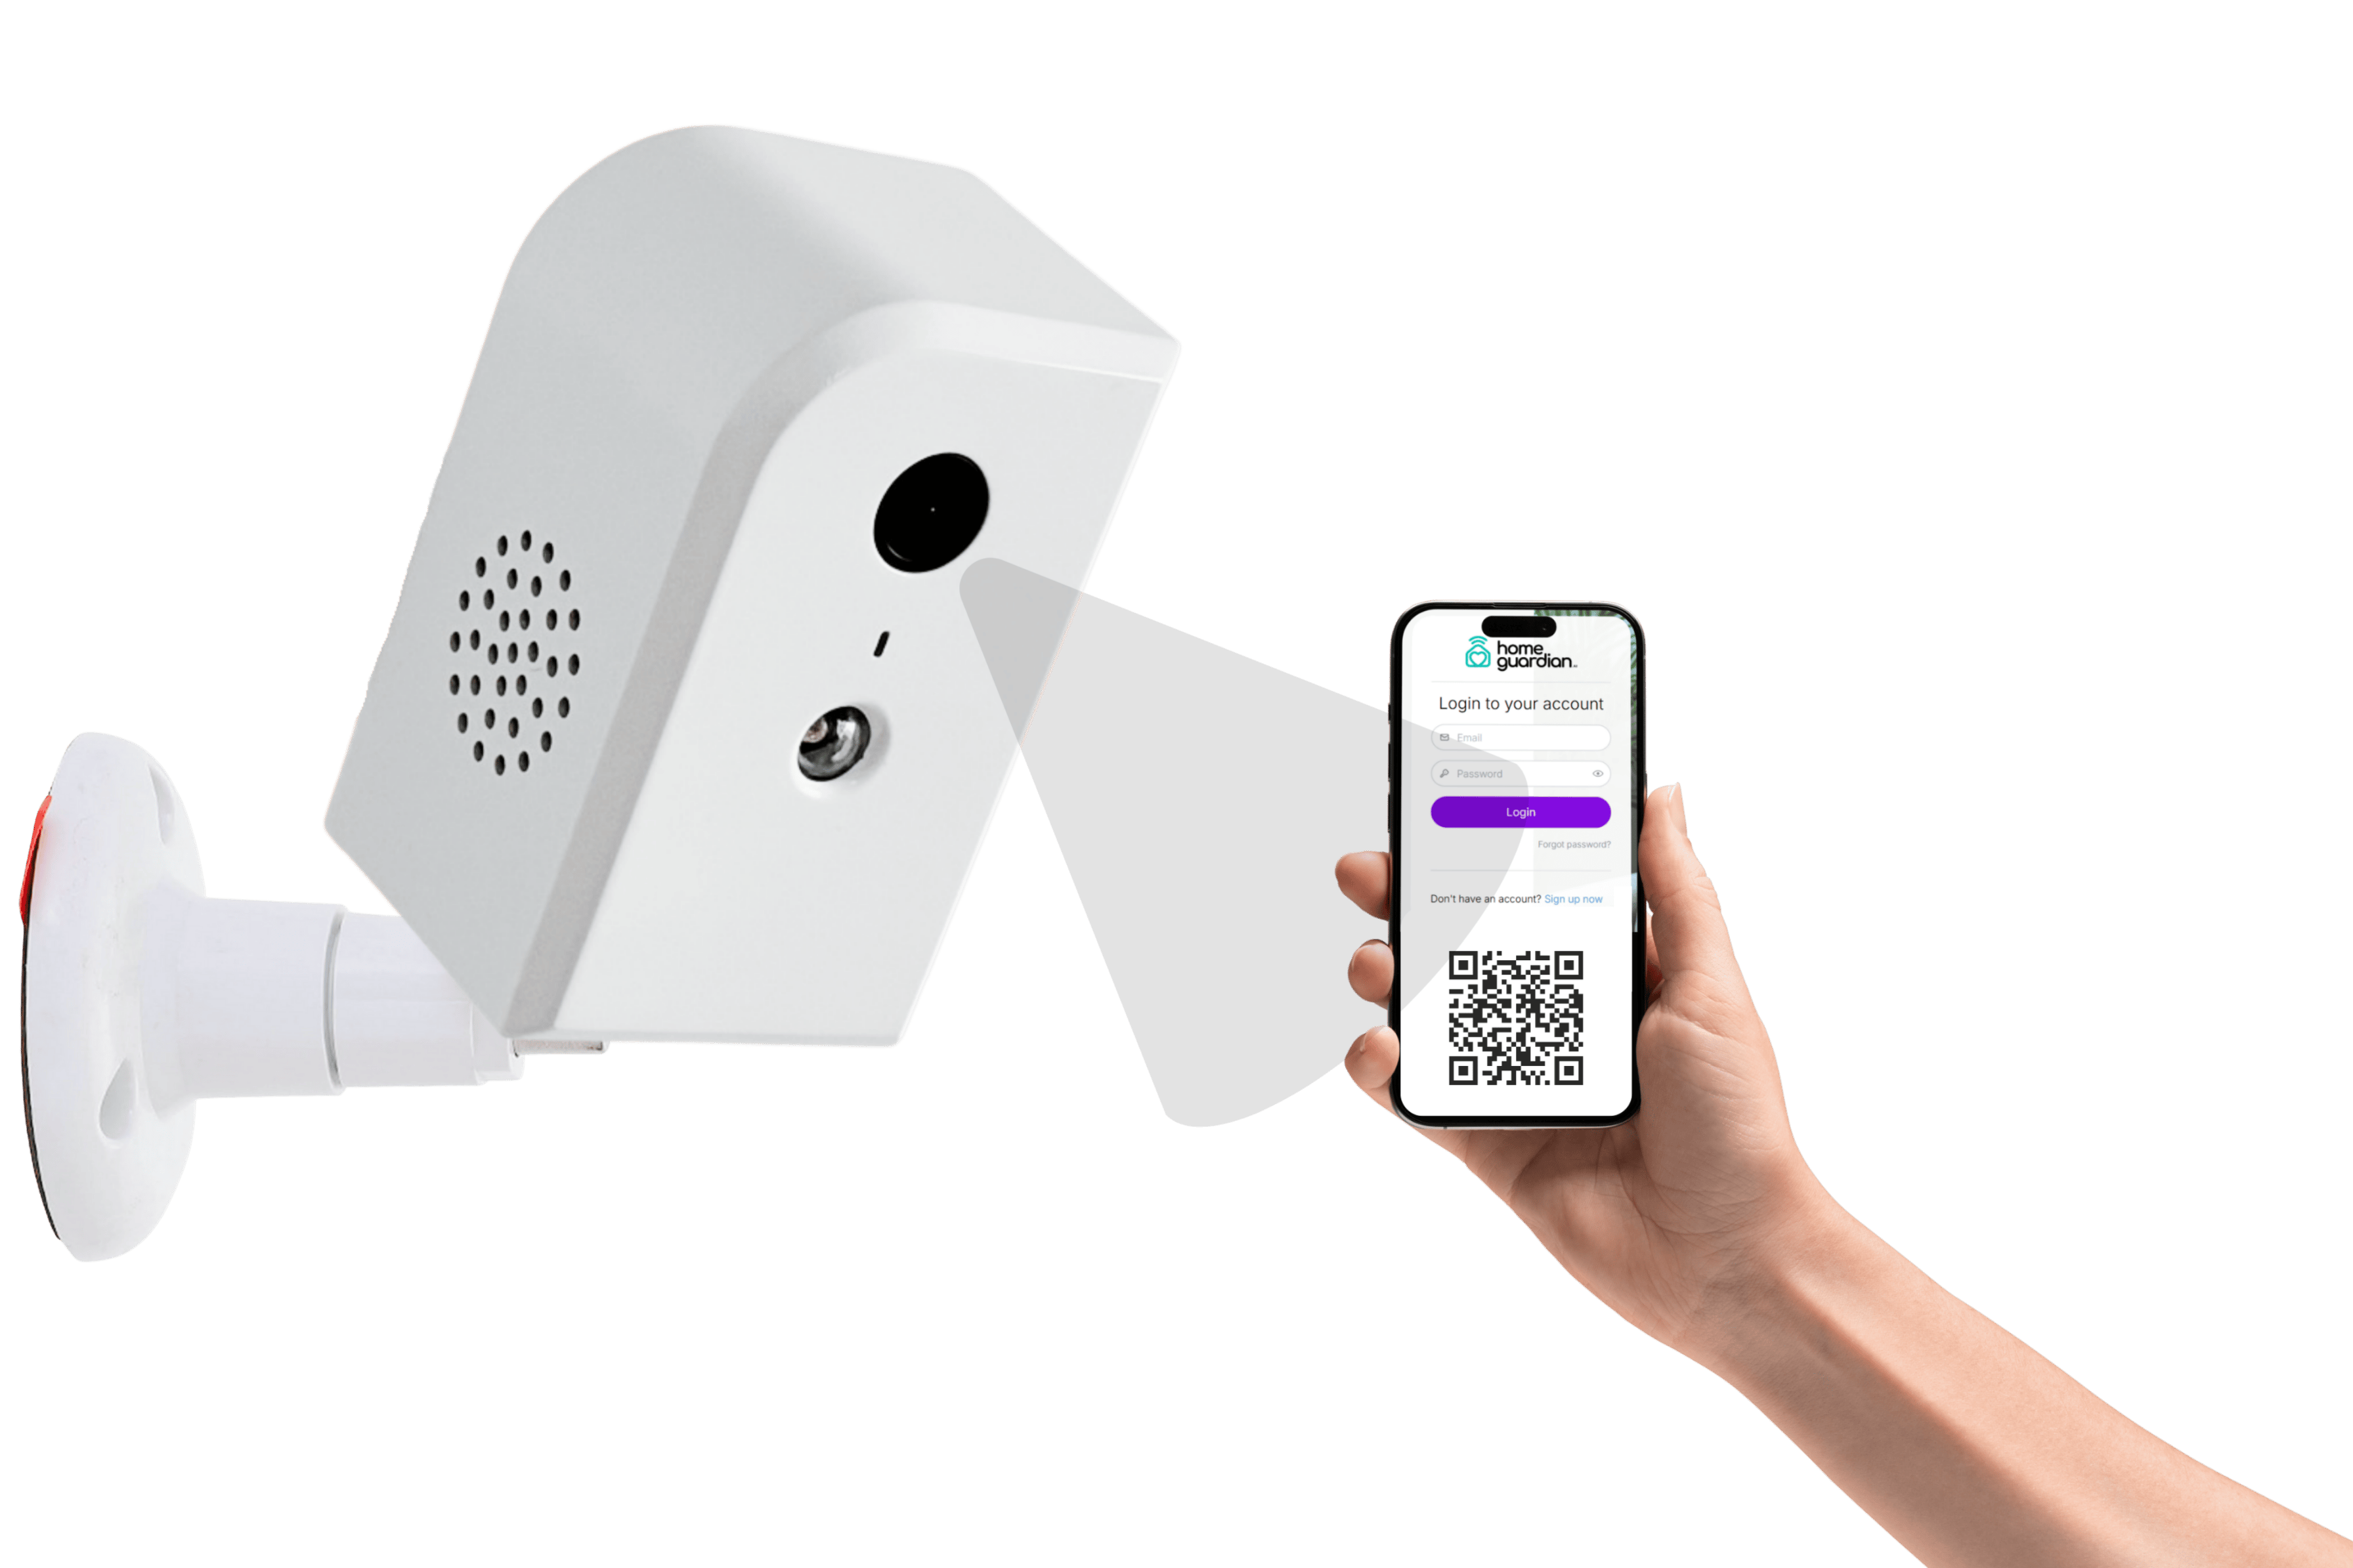
a) Go to portal.homeguardian.ai on your phone. You will see a prompt to enter Wi-Fi details.
b) Enter the Wi-Fi SSID and password into this page.
c) Once correctly entered, a QR code will appear. You can find your login details on the Welcome Sheet included in the box
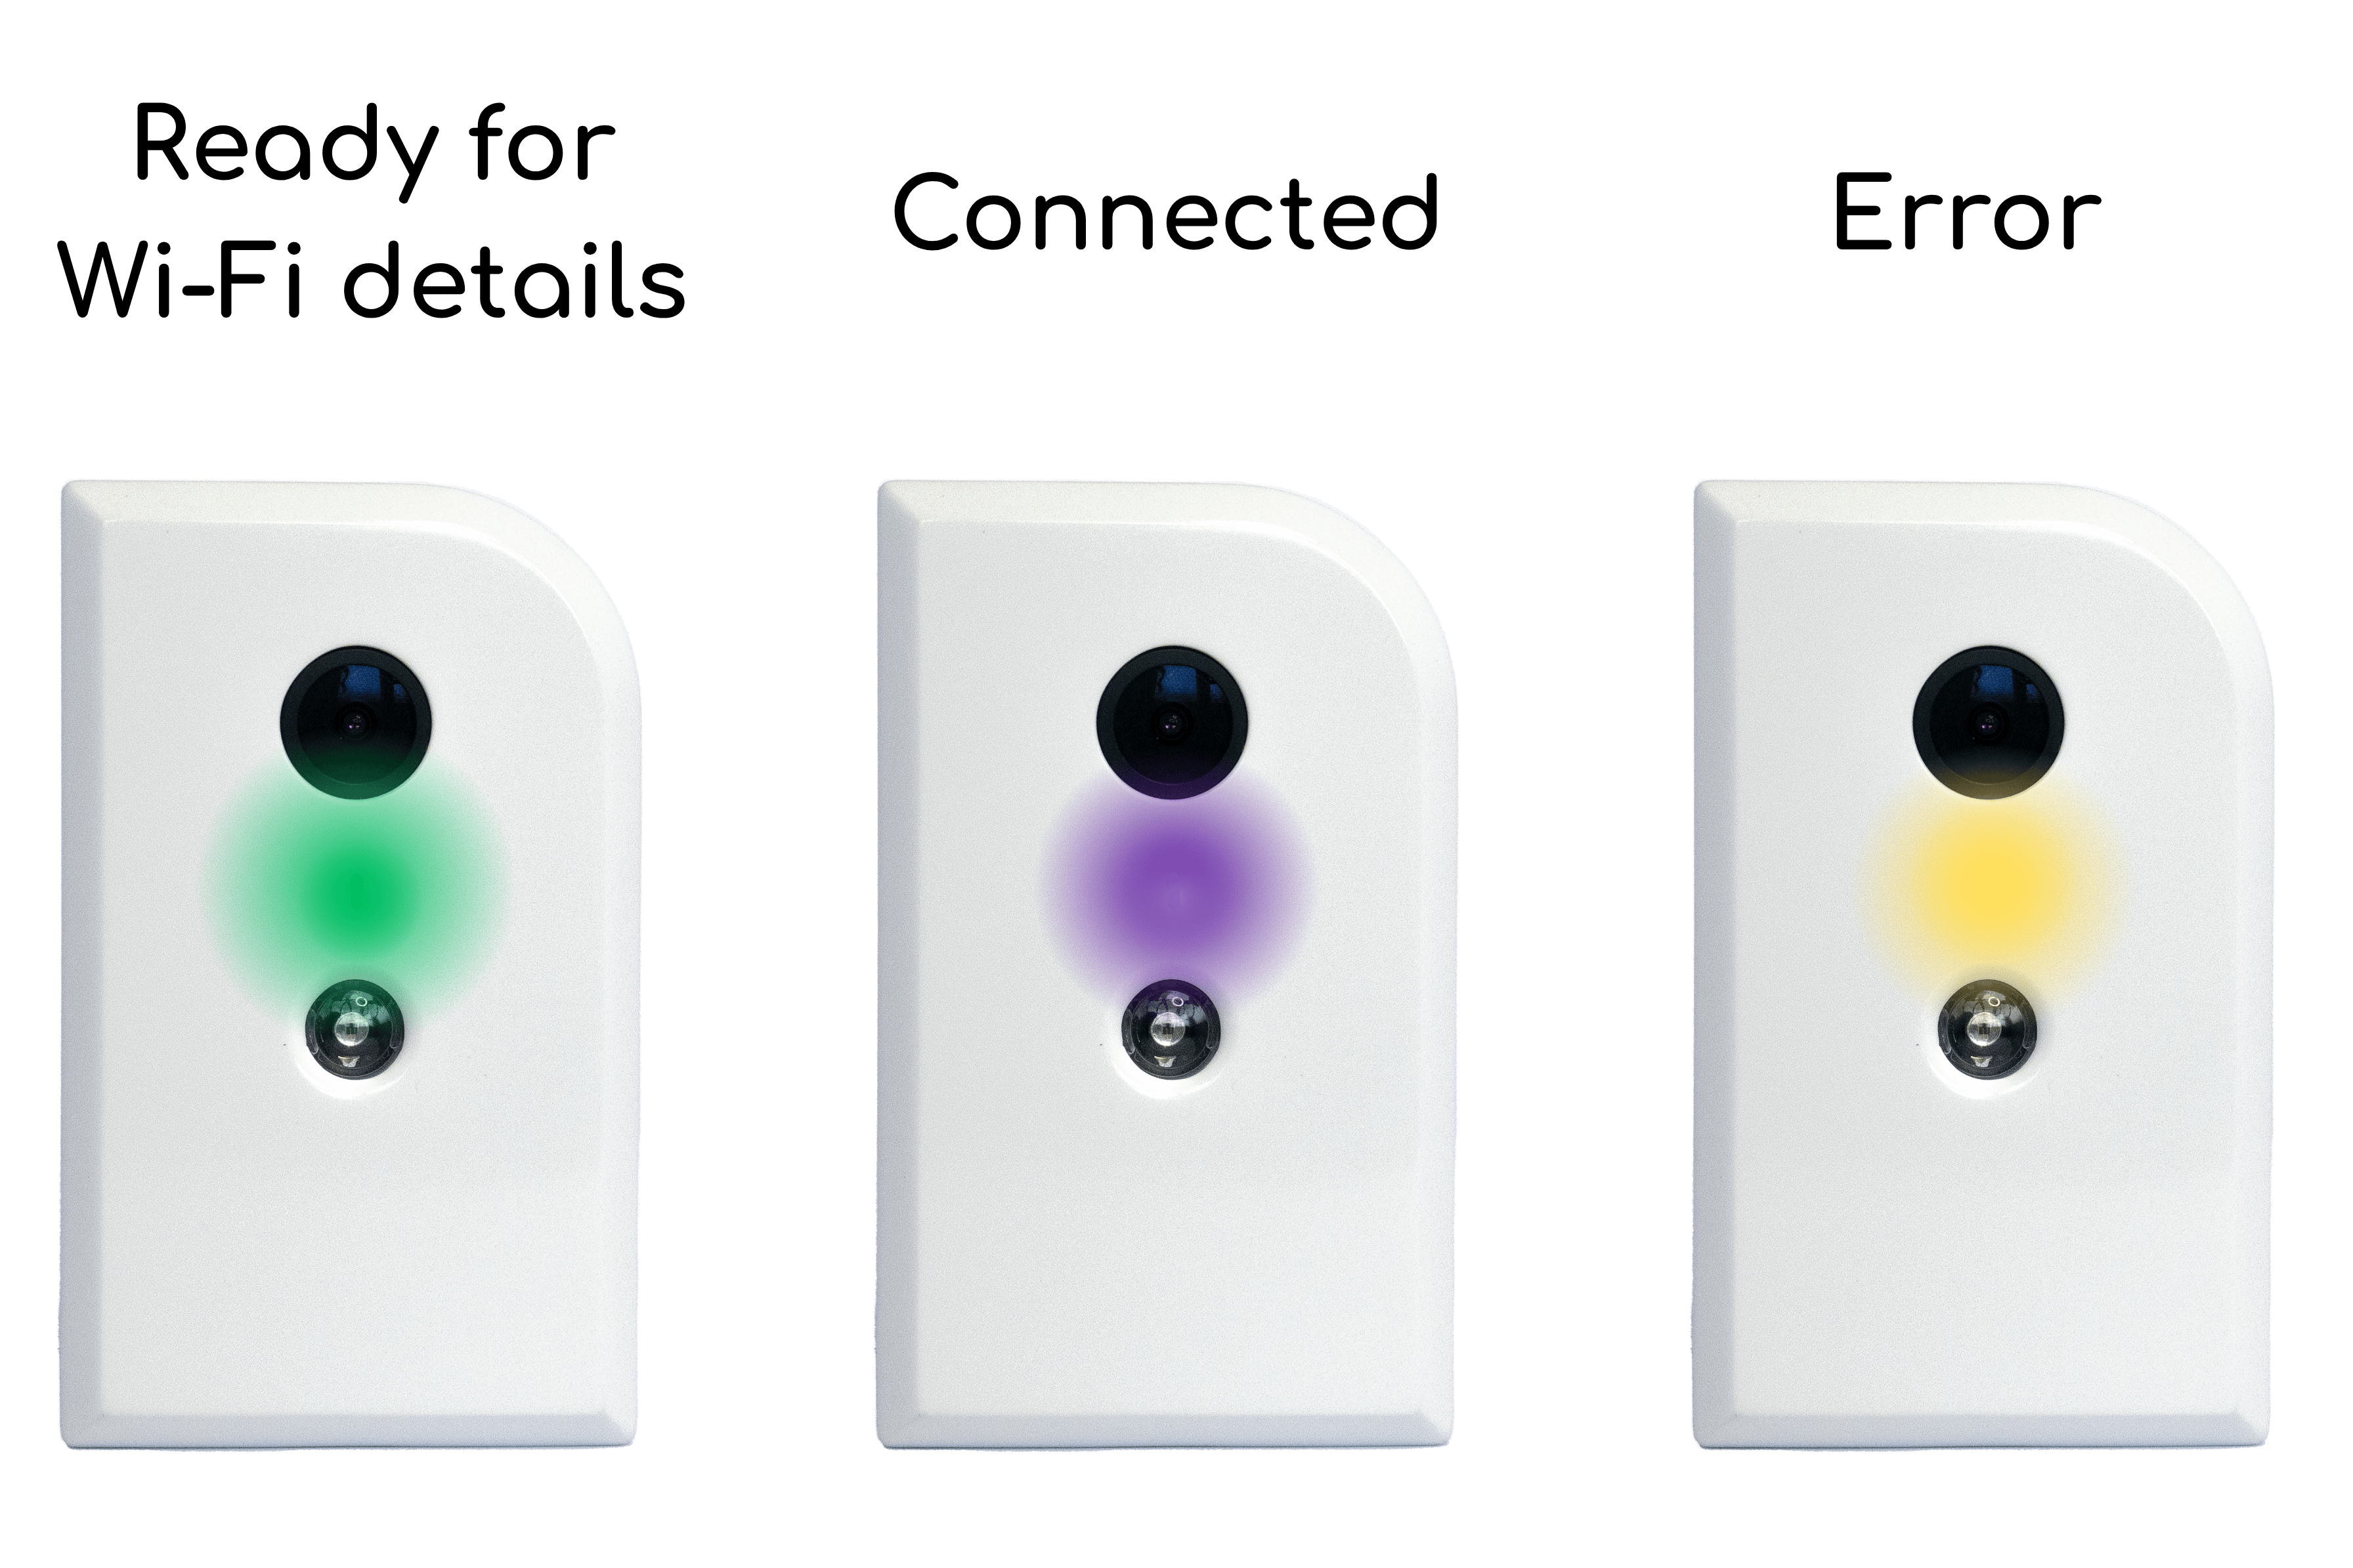
Hold the QR code directly in front of the device, approximately 15 to 30cm away, and move it backwards and forwards until the light changes to green or you hear a beep.
Shortly afterwards, the light will turn purple, indicating the HomeGuardian device is now connected to the customer’s Wi-Fi.
Wait for the ‘green’ light to become steady. When the device light turns ‘purple’ – it means the device is online.
If the device light stays ‘yellow’ instead of ‘green’– it means the device is not online. Please call HomeGuardian Support for assistance – 1300 248 324